A step-by-step guide fails in a specific way. The reader is on step 4, the screenshot shows a dialog that looks almost but not quite like theirs, and they stop being sure they are in the right place. Everything after that is guesswork. Most of the craft of step screenshots is about not creating that moment.
Capture the hesitation, not the procedure
Do the task yourself first, slowly, and notice where you pause. Those pauses are where a picture earns its place: the setting buried three levels down, the button that looks disabled but is not, the field whose label does not match what it wants.
Everything else is a sentence. "Click OK" does not need an image, and every image you add is one more thing to re-capture when the software changes.
Crop tighter than feels comfortable
A full-screen capture of a large monitor, shrunk to fit a page, turns the important control into six pixels. Crop to the dialog or panel being acted on, plus just enough surroundings for the reader to recognise where they are — usually the window title, a tab bar, or the panel heading above it.
Keep the crop width consistent across the guide. Images that all sit at the same width read as a set; images at random sizes read as a pile.
Number in the order the reader acts
Not top-to-bottom, not left-to-right — the order in which the hand moves. If the reader must choose a value from a dropdown before a checkbox becomes available, the dropdown is 1 even when it sits lower on screen.
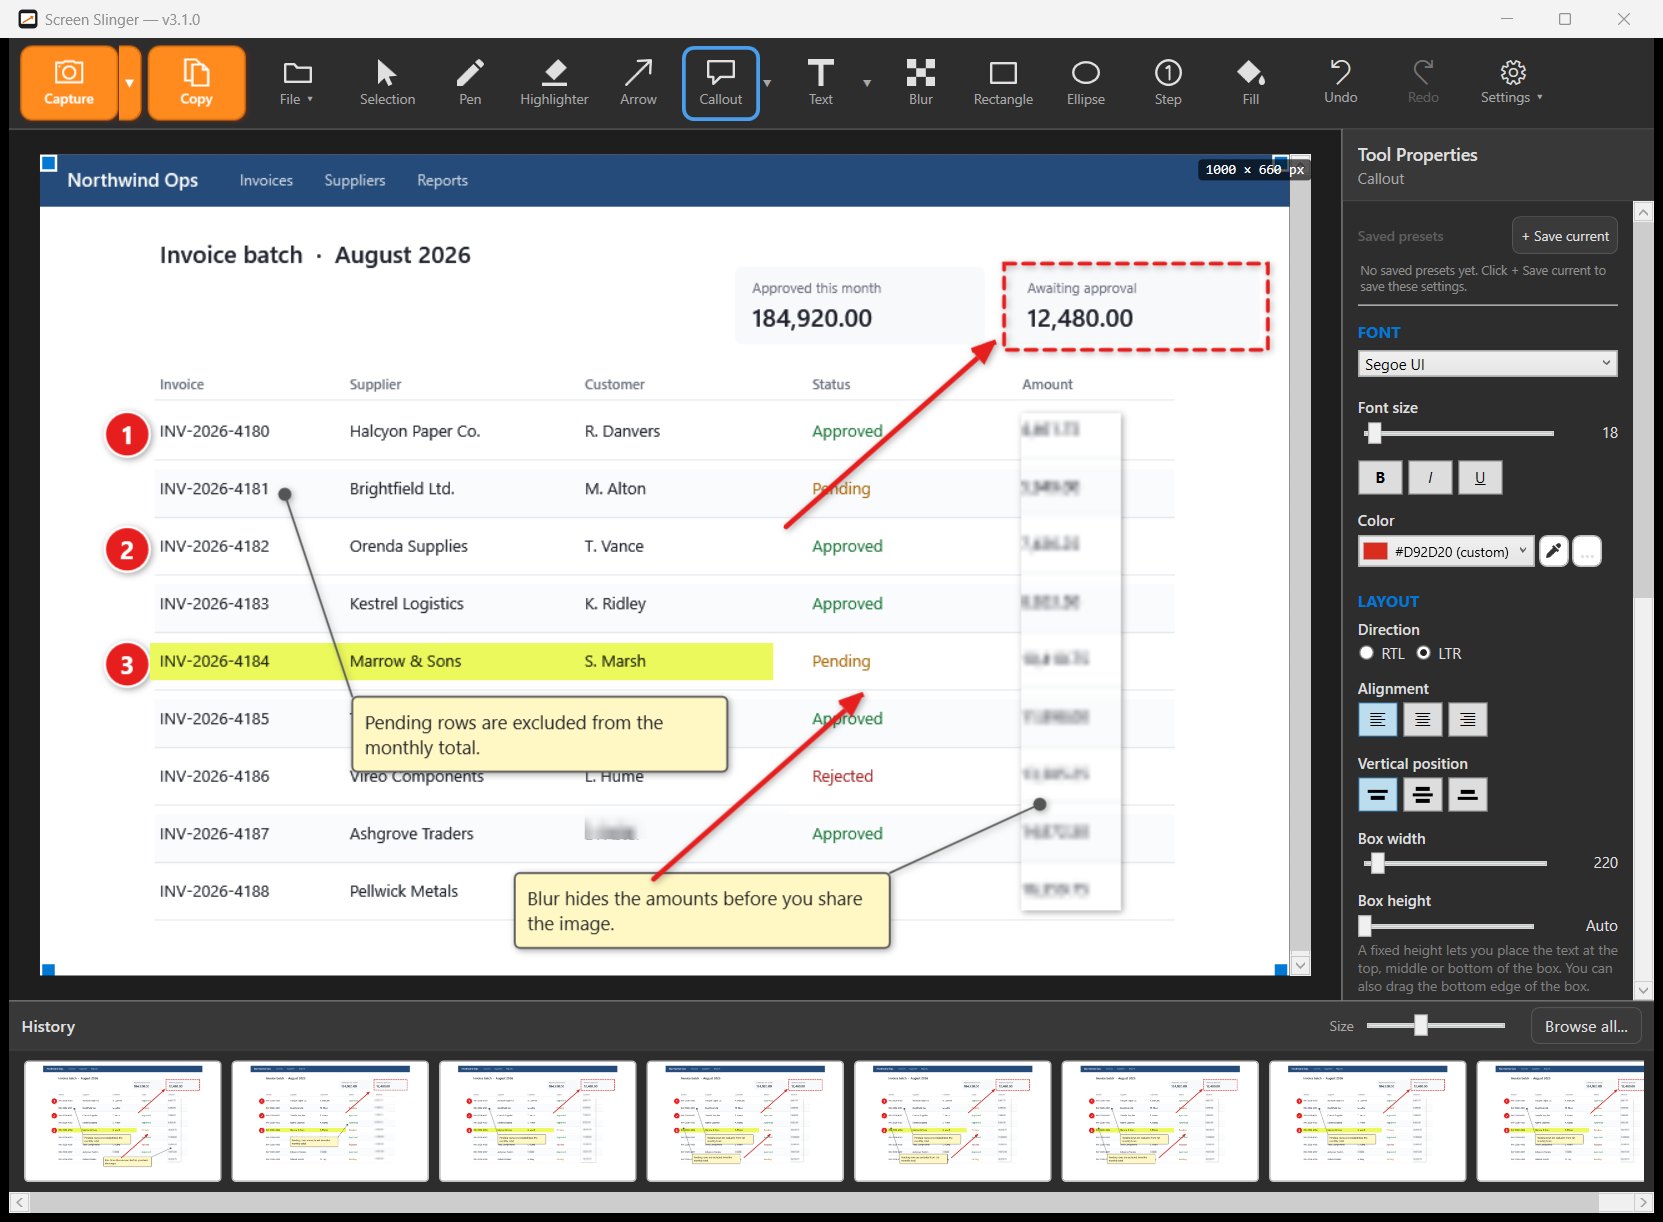
- Several actions in one dialog → one screenshot with markers 1, 2, 3. Three near-identical images of the same dialog are harder to follow, not easier.
- The screen changes between actions → a new screenshot.
- Place markers beside the element, not covering it. The reader needs to see the thing you are pointing at.
Numbers say where. Callouts say what. A marker points; a speech bubble carries the value to type or the option to choose. Put a callout on every element and the picture becomes a wall of text with a screenshot behind it. Two or three per image is usually the ceiling.
Consistency is most of the perceived quality
Same arrow colour throughout. Same marker size. Same font. Same light or dark theme in the application you are capturing — switching halfway through is jarring and makes a reader wonder whether they are looking at a different version.
This is the argument for saving a set of tool presets before you start rather than picking colours per image. It is also the argument for doing a whole guide in one sitting where you can.
Assume the interface will move
It will. A vendor ships an update, a button moves, and half your images are now subtly wrong. The difference between a five-minute fix and an afternoon is whether your annotations are still objects you can drag or have been flattened into pixels.
Keep the editable source files alongside the exported images, and name them after the step they belong to. Future you will not remember which of twelve PNGs was step 7.
The workflow, condensed
- Walk the procedure once and note where you hesitate.
- Capture only those points, cropped tight, at a consistent width.
- Add numbered markers in action order; add a callout only where the number alone is not enough.
- Keep colours, sizes and theme identical across every image.
- Export, then read the finished guide as someone who has never done the task.
- Keep the editable sources for when the interface changes.
Doing this in Screen Slinger
Screen Slinger is our own tool, and it was built for exactly this job.
The step marker is a dedicated tool that numbers itself — place them in the order you want the reader to act and the sequence takes care of itself; delete one from the middle and the rest renumber. Speech-bubble callouts carry the text. Both stay editable objects, so when the vendor moves a button next spring you reopen the file and drag the marker rather than starting over — the undo history is saved with the file, so that stays true weeks later.
Tool presets hold your arrow, your marker size and your callout style, which is what keeps image 14 looking like image 1 across a long guide.
Written by the team behind Screen Slinger, a Windows screenshot and annotation tool. The method above works in any editor that can draw a numbered circle — the honest comparison with the other tools is here, and the companion guide on hiding sensitive information matters if your screenshots contain customer data. There is also a guide on capturing a long scrolling page.